Hub/Sink Replication: Sink Task
-
A Replication Sink is an ongoing task, designed to replicate documents to and/or from Hub tasks to maintain a live replica of a database or chosen documents of it.
- The Sink is always the one to initiate the connection with the Hub, but data can be replicated in either or both directions.
- Hub/Sink connections are secure, and require certification.
-
While defining a Sink task using the Studio, you can -
- Import a certificate issued by the Hubs that this SInk uses
- Choose replication direction/s (
Hub->Sink/Hub<-Sink/Hub<->Sink) - Use Filtered Replication to choose which documents are to be replicated
-
In this page:
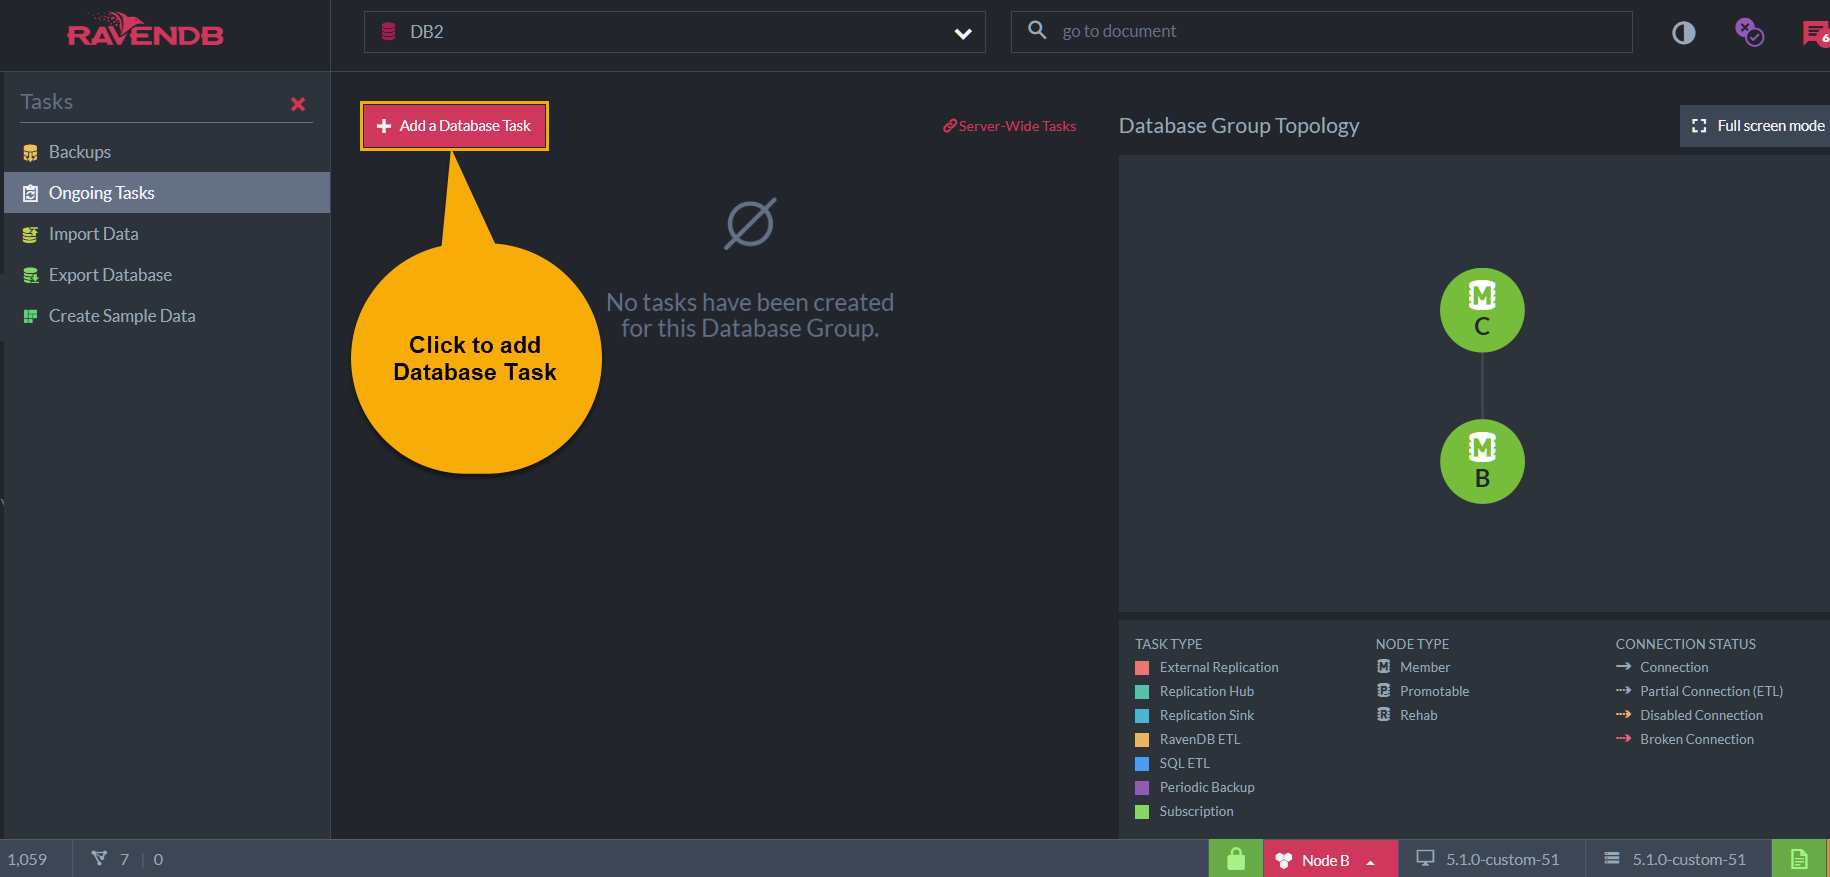
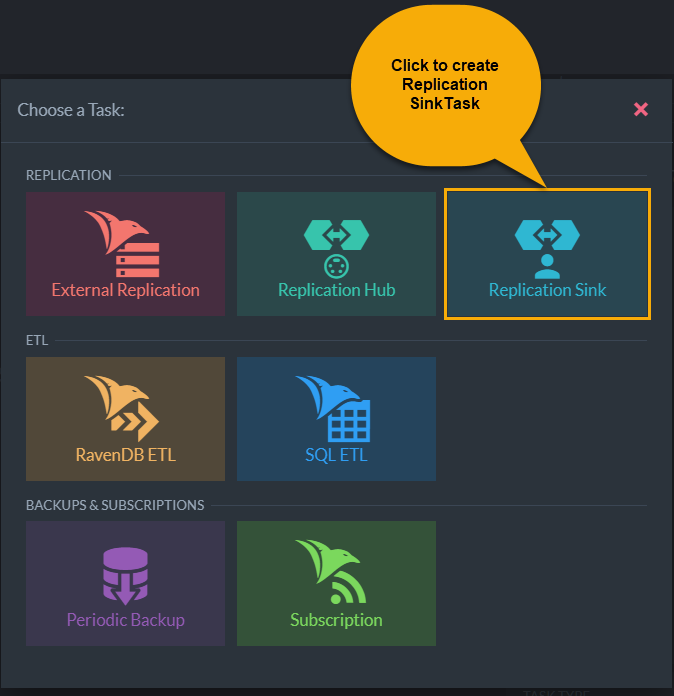
Create an Ongoing Replication Sink Task
Import Configuration From Hub

-
Import configuration from Hub
- Click this button to browse the file system for a configuration
file you have previously exported from the Hub task you want this
Sink to connect.
Importing a configuration file would fill Sink, Access and Filtering fields you've filled while defining the Hub task, including certification details, and save you the effort of redefining them here.
- Click this button to browse the file system for a configuration
file you have previously exported from the Hub task you want this
Sink to connect.
Sink Configuration
-
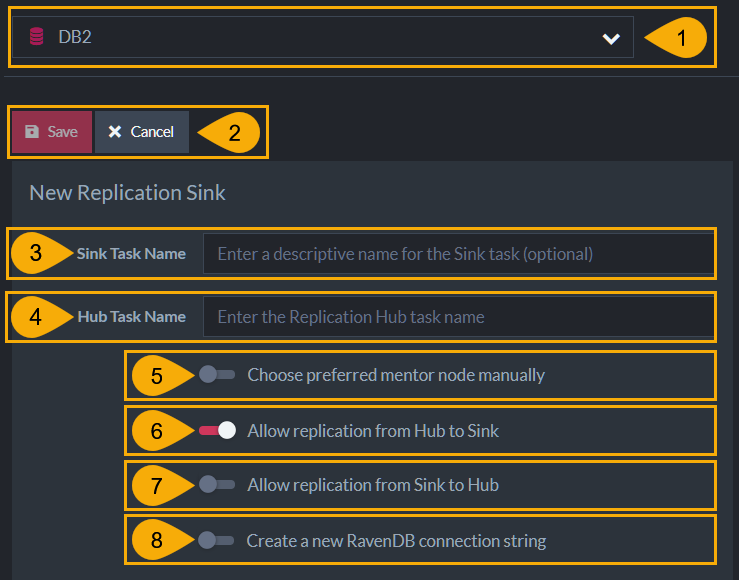
Choose Database
- Choose the database that the task would replicate data for,
from a list of databases whose database-group includes this node.
- Choose the database that the task would replicate data for,
-
Save / Cancel
- Save to create or update the task
- Cancel to dismiss any changes or cancel task creation
-
Sink Task Name
- Choose a name for your Sink task
-
Hub Task Name
- Enter the name of the Hub task this Sink is to connect with.
-
Choose preferred mentor node manually
- Choose which node would run the Sink task by default, from a list of nodes running the database you chose.
-
Allow replication from Hub to Sink
- Enable or Disable data replication from Hub to Sink.
-
Allow replication from Sink to Hub
- Enable or Disable data replication from Sink to Hub.
-
Create a new RavenDB connection string
The connection string defines the path to the Hub task this Sink is to use.- Disable to select an existing connection string

a. Click to select from a list of existing connection strings - Enable to create a new connection string
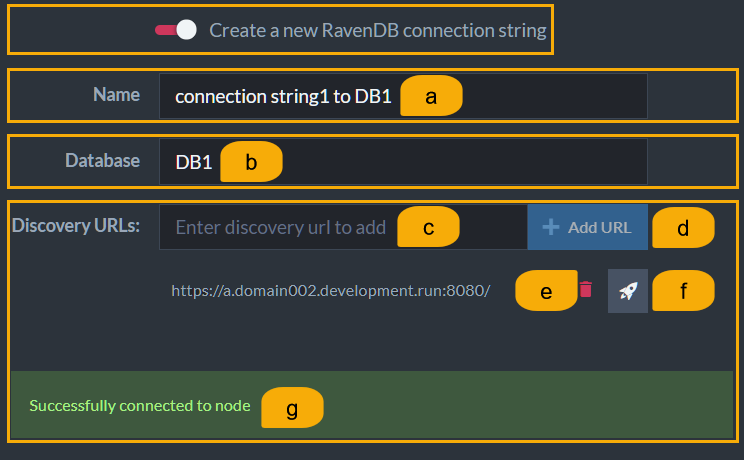
a. Enter a connection string name that hasn't been used yet
b. Enter the name of the database running the Hub task
c. Enter URLs of nodes that may run the Hub task
d. Click to add the URL to the list
e. Remove URL
f. Verify that the URL is reachable
g. Reachable URLs will produce this affirmation
- Disable to select an existing connection string
Access Configuration
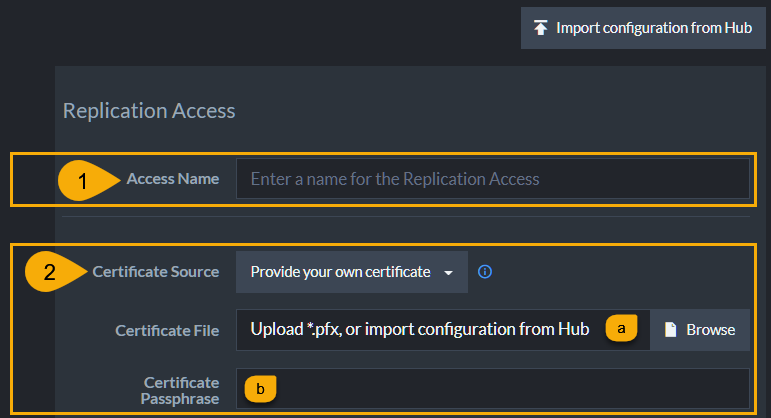
New Replication Access
-
Access Name
- Provide a name for this Sink access
-
Certificate Source
Choose a source for the Sink certificate.
(Import Hub configuration to save yourself the need to redefine these details.)-
Provide your own certificate
Use this option to import a certificate of your own, e.g. one you've issued using the Hub task.
a. Certificate File
Use the Browse button to locate the exported certificate file.
b. Certificate Passphrase
If you need to provide a passphrase for your certificate, enter it here. - Use the server certificate
 Choose this option if you prefer to import and reuse the certificate
that is already used by the server to validate client access.
The Studio will attempt to import it from the server. Use the Download button (a) if you need to locate it manually.
-
Provide your own certificate
Defining Filtered Replication
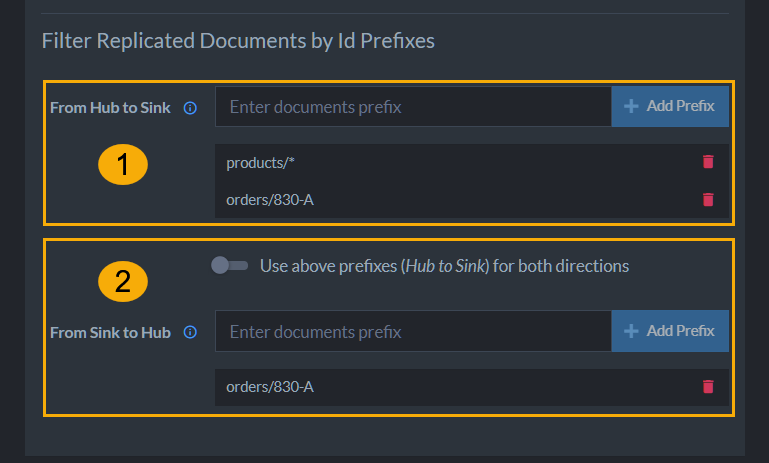
Defining Filtered Replication
-
From Hub to Sink
-
Enter each path you want the Hub to replicate to the Sink, in
the
Enter documents prefixtext box.
Click theAdd Prefixbutton to add it to the prefix list.- You can define a prefix that uses a wildcard (
*).
Place the wildcard in the prefix' suffix, after/or-.
e.g.products/* - You can provide exact document IDs.
- You can define a prefix that uses a wildcard (
-
Enter each path you want the Hub to replicate to the Sink, in
the
-
Use above prefixes (Hub to Sink) for both directions
-
Enable this option to allow replication of the same prefixes in both directions, Hub to Sink and Sink to Hub.
Disable it to provide an independent list of prefixes for Sink to Hub replication.Note that only prefixes that are defined in both lists will be replicated.
-
Ongoing Tasks View
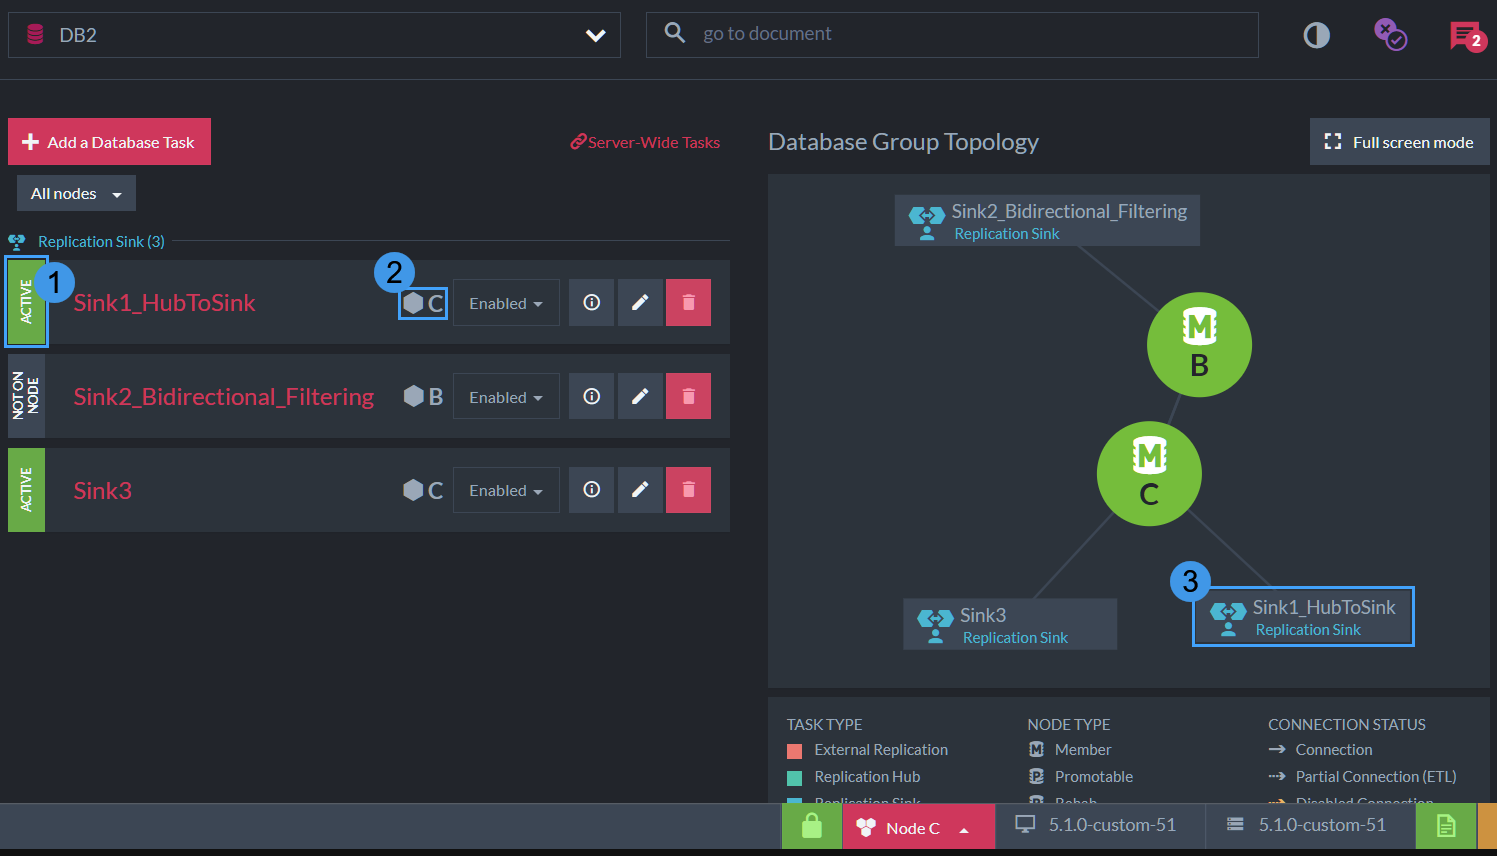
Ongoing Tasks View Info
-
Task Status
Task status may be -- Active
Sink tasks turn active when replication actually takes place, after a document they replicate has changed. - Not Active
- Not on Node
The task is not defined for this node.
To check this task's status, open the Ongoing Tasks view from a node the task belongs to.
- Active
-
Responsible Node
The node responsible for this task. -
Topology View
Show the task and its responsible node in the database group topology.

Ongoing Tasks View Buttons
- Enable/Disable task
- Edit task
- Delete task
- Info button
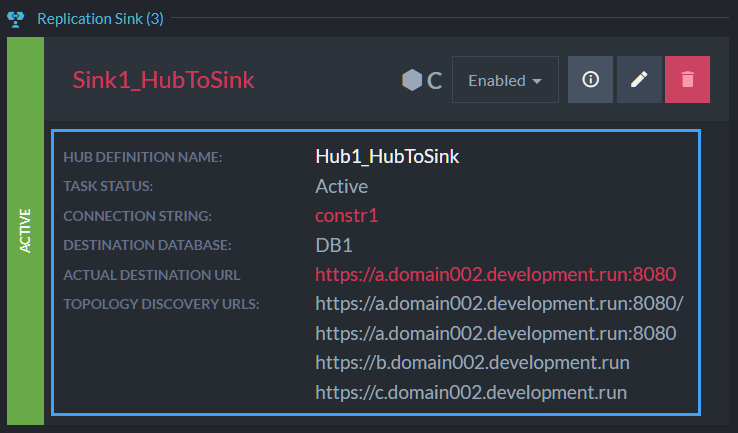
Click the Info button to show the following details:
